


- Specifications:
- Pipe Material: Aluminum
- Valve Material: Aluminum Alloy
- INCLUSIONS:
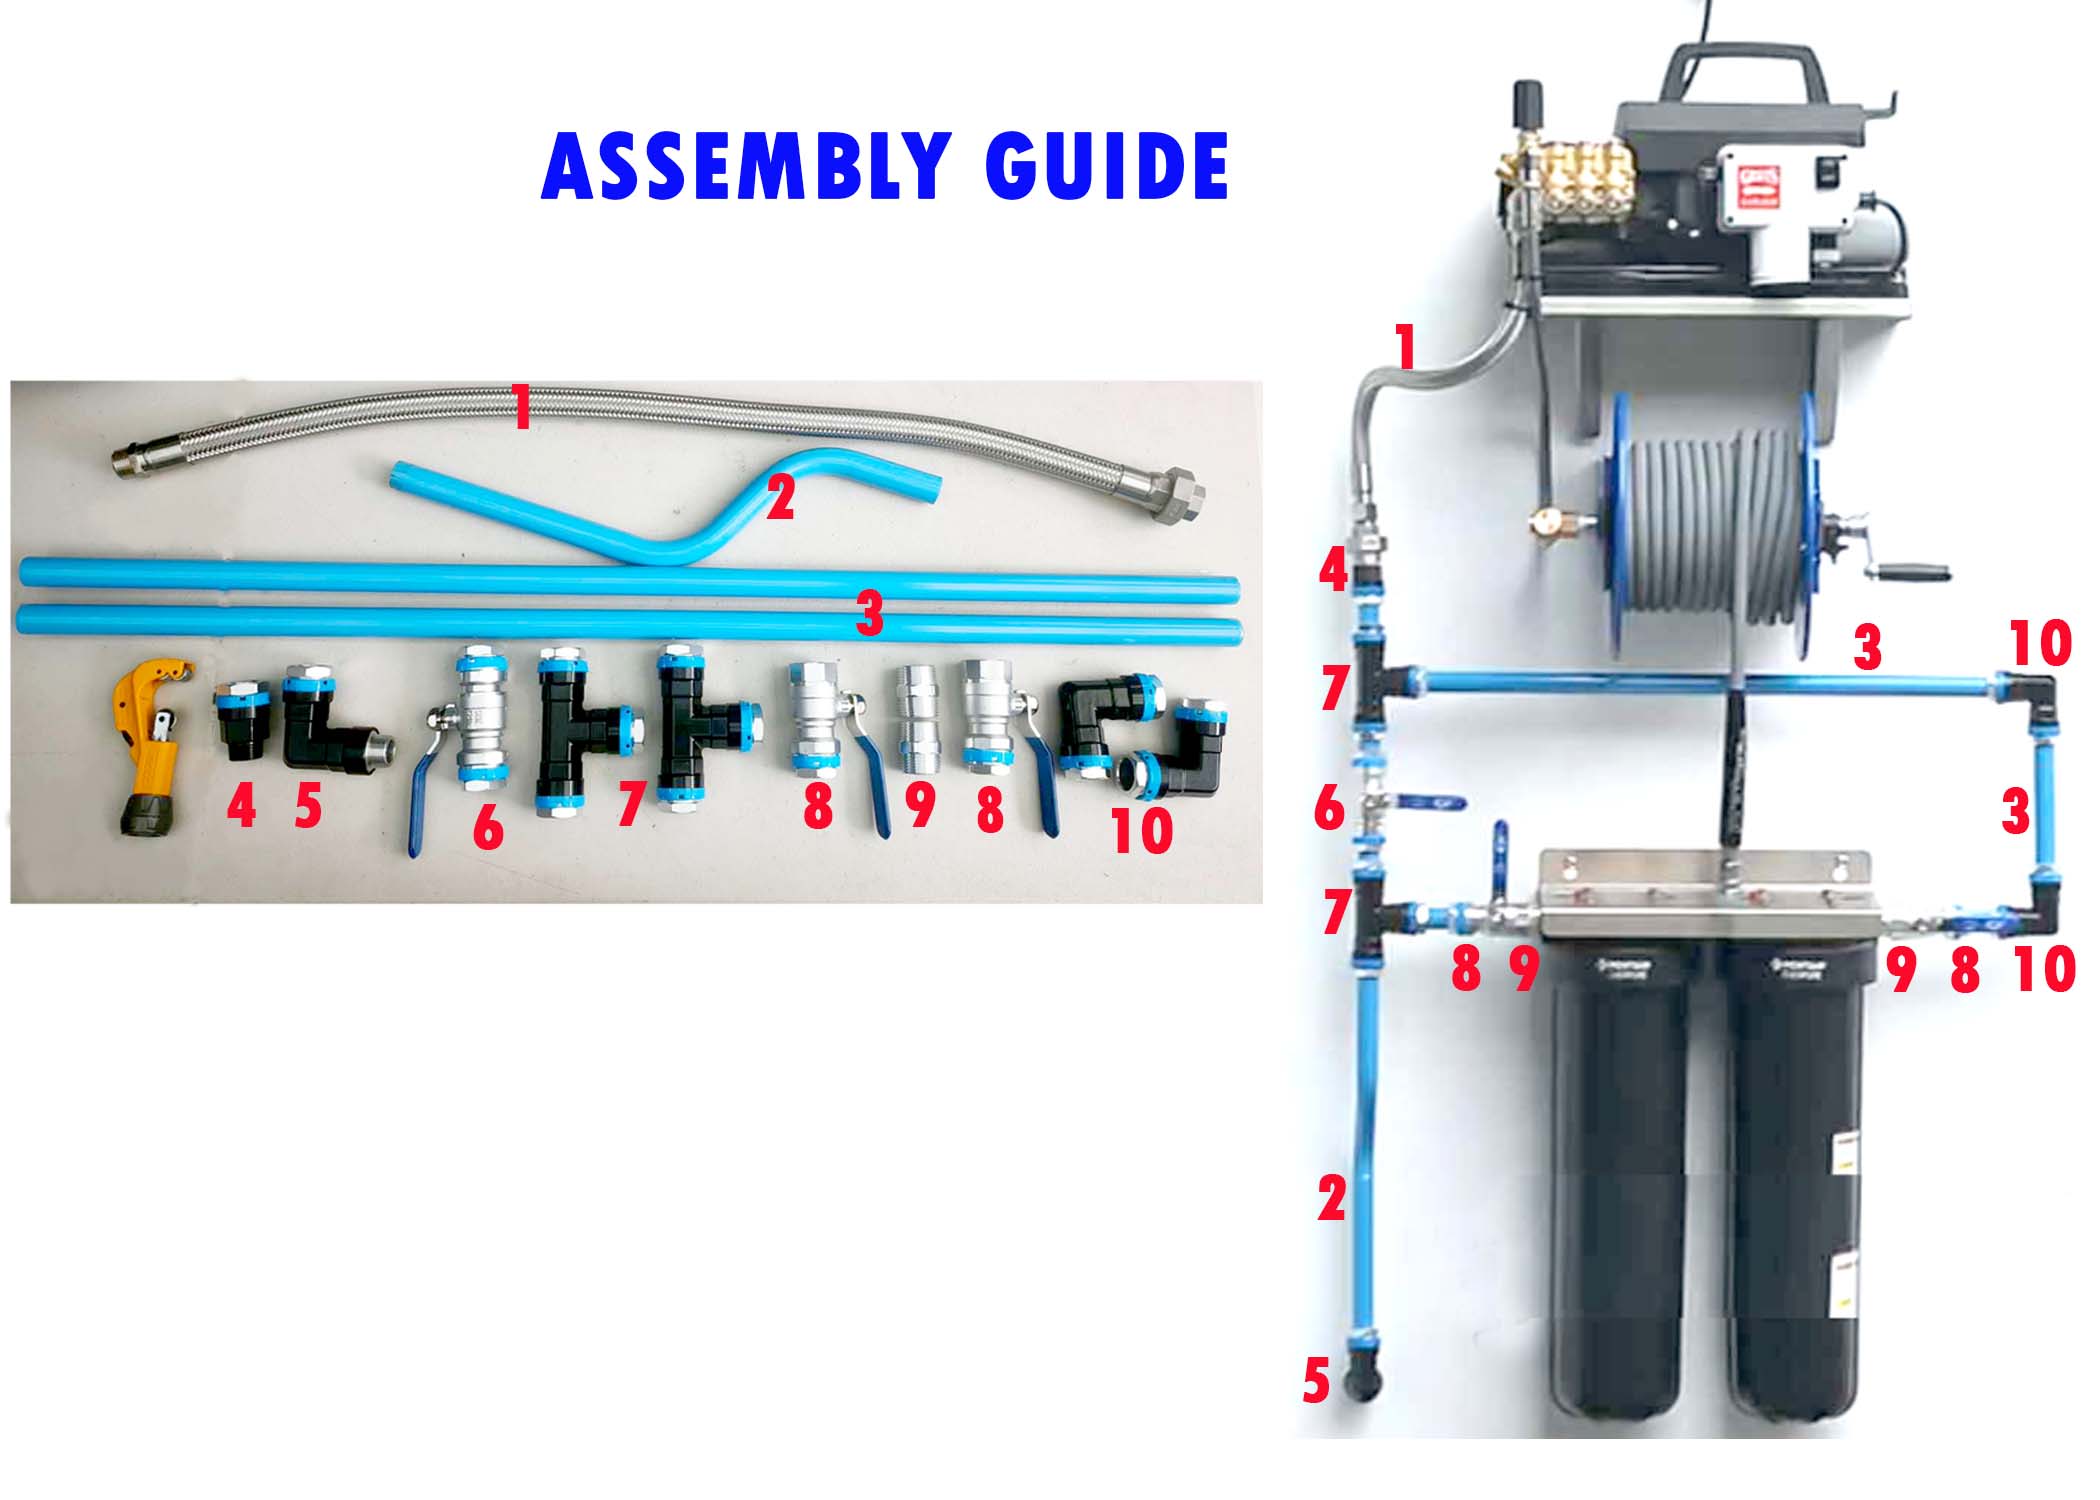
1x STAINLESS INLET HOSE 3ft 3/4”
1x BENT ALUMINUM PIPE
2x ALUMINUM PIPE 100cm 1”
2x ELBOW UNION
1x ELBOW UNION THREADED
3x BALL VALVE
2x T UNIONS
2x MALE X MALE 1”
1x PIPE TO MALE 3/4”
1x PIPE CUTTER
DIY Installation Guide
Piping Kit for the Deionizer System - ION-X Deionizer
Plan Your Layout First. Before installing anything, plan where each component will go on your wall.
Step-by-Step Assembly
Step 1 — Mount the ION-X Deionizer System
- Locate wall studs using a stud finder.
- Install the mounting bracket securely to the wall.
- Hang the ION-X system on the bracket.
- Ensure the unit is level.
This unit will be the center of your plumbing system.
Step 2 — Cut the Aluminum Pipes
Measure the distance between components.
- Mark pipe length carefully.
- Cut the aluminum pipe using a pipe cutter or saw.
- Use the deburring tool to remove sharp edges.
Deburring is important to prevent leaks and ensure proper fitting.
Step 3 — Assemble the Hardline Piping
The kit uses 1-inch aluminum piping with union fittings.
Typical order:
Water Source → Ball Valve → T-Union → ION-X Inlet
Then:
ION-X Outlet → Union Elbow → Pressure Washer Inlet
Tighten fittings using the supplied spanner wrench.
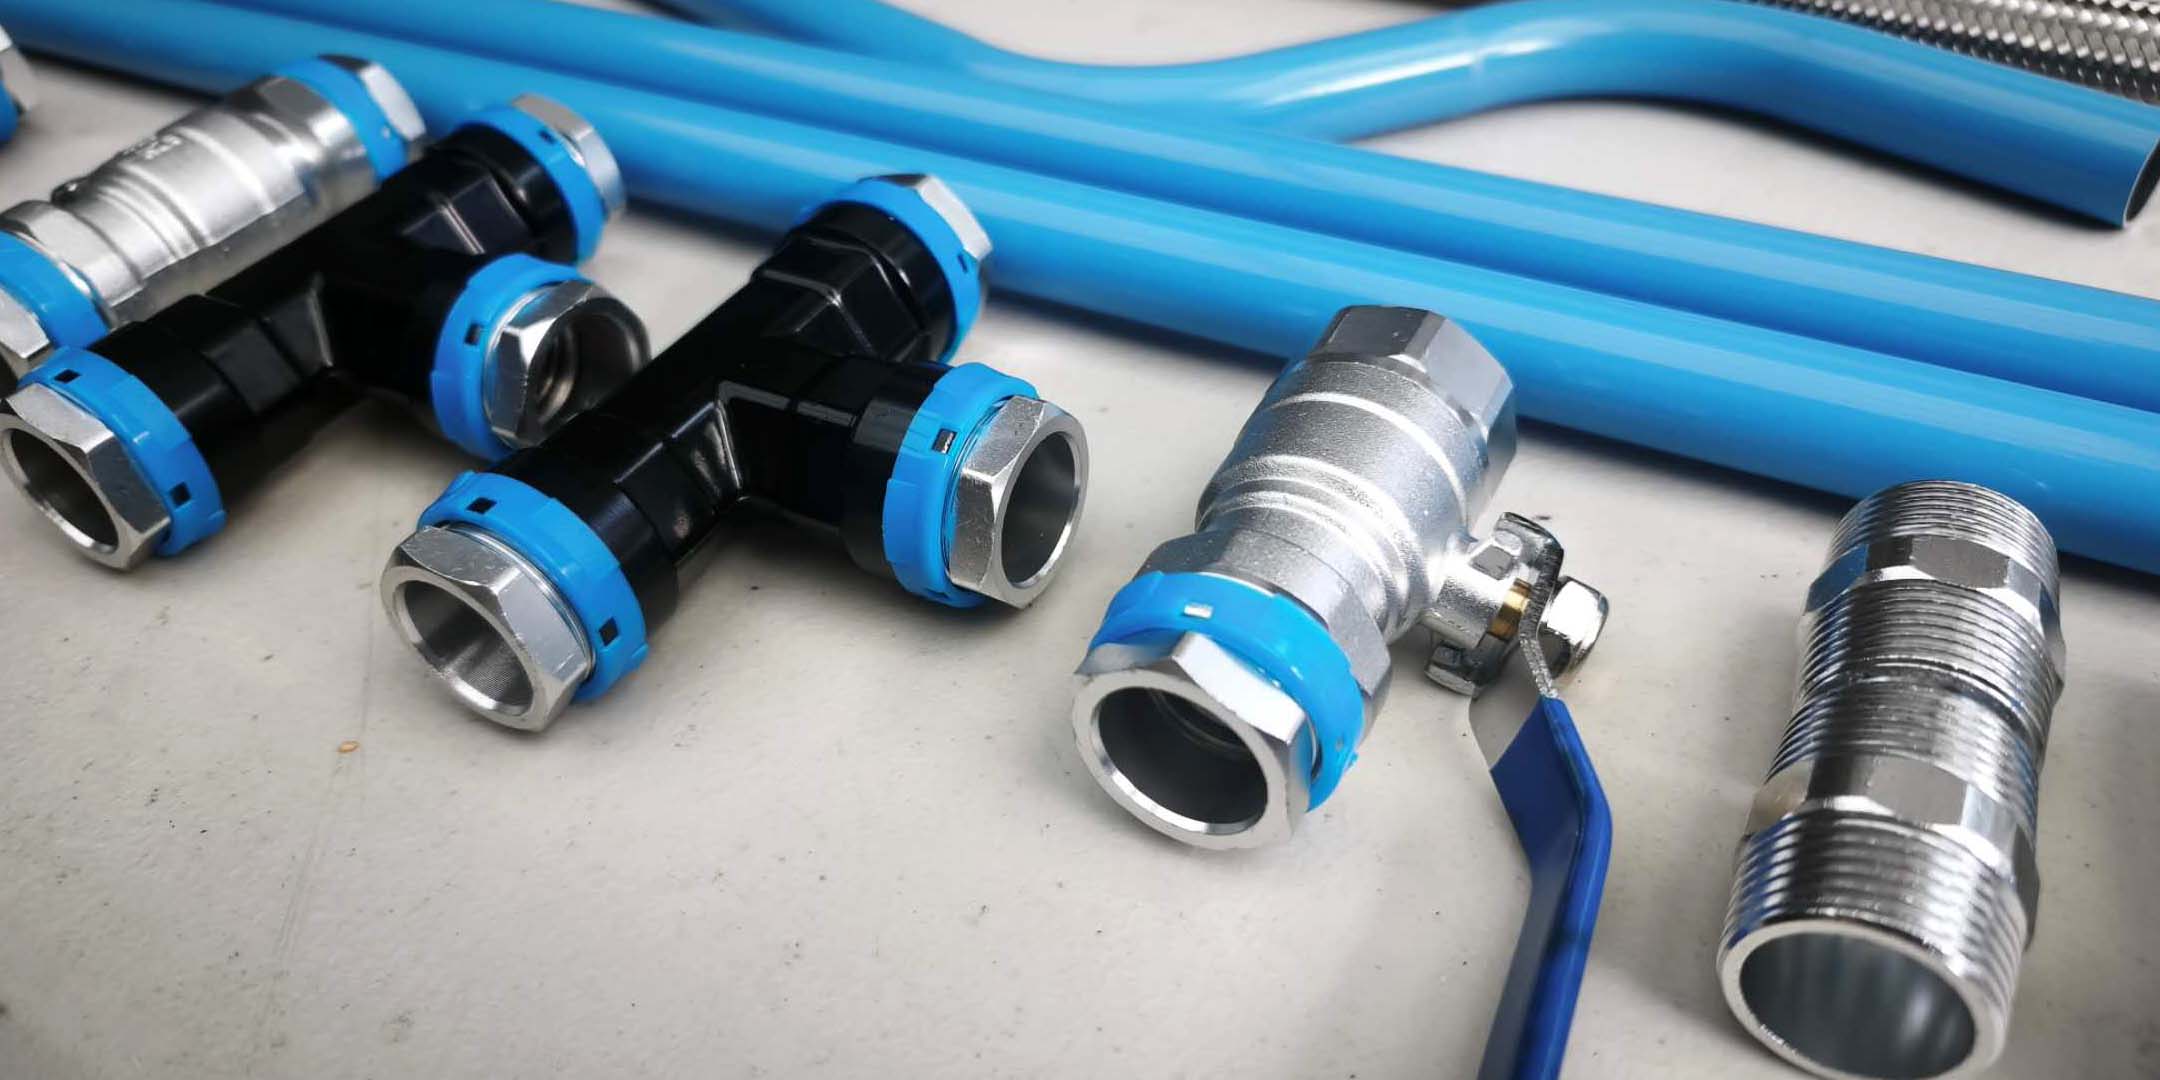
The kit includes:
- aluminum pipes
- union elbows
- ball valves
- stainless adapters
- flexible inlet hose
Step 4 — Install the Bypass Valves
The system usually has two valves.
These allow you to:
- run tap water directly
- or run DI water through the ION-X Filters
This saves DI resin when you don't need spotless rinse.
Typical use:
- Valves open → DI water rinse
- Valves closed → bypass system
Step 5 — Connect the Water Supply
Attach the water supply line:
Water Bib → Flexible Hose → Piping Kit Inlet
Quick-connect fittings are commonly used to make the connection easier.
Step 6 — Connect the Pressure Washer
From the outlet of the ION-X:
ION-X Outlet → Hose → Pressure Washer Inlet
Now your pressure washer receives deionized water for final rinsing.
Step 7 — Leak Test
Before full use:
- Turn on the water slowly
- Check every connection
- Tighten fittings if needed
- Run water through the system
If no leaks appear, the system is ready.
Tips for DIY Installers
✔ Measure pipes before cutting
✔ Always deburr pipe edges
✔ Use thread sealant of Teflon on all NPT fittings
✔ Mount everything into studs (heavy when full of water)
✔ Keep valves accessible
Also remember that this setup is semi-custom, meaning pipe lengths and placement depend on your garage layout.


